

How to see your body as lines, not flaws: Lines and Shapes 4
Forget ‘pear’ and ‘hourglass.’ Learn to read the lines you already know
Ok, read [Part 1], [Part 2], and [Part 3] first. This is the last one in the series (for now). Seriously, read those first. This won’t make sense otherwise.
At the risk of sounding like a total asshole, I often get told: “everything looks good on you.” First, thank you. I’ll take the compliment. But second… nope. Everything does not look good on me. What’s true is that over time I’ve honed so sharply into my lines and my style words that I only buy (and wear) things that do look good on me.
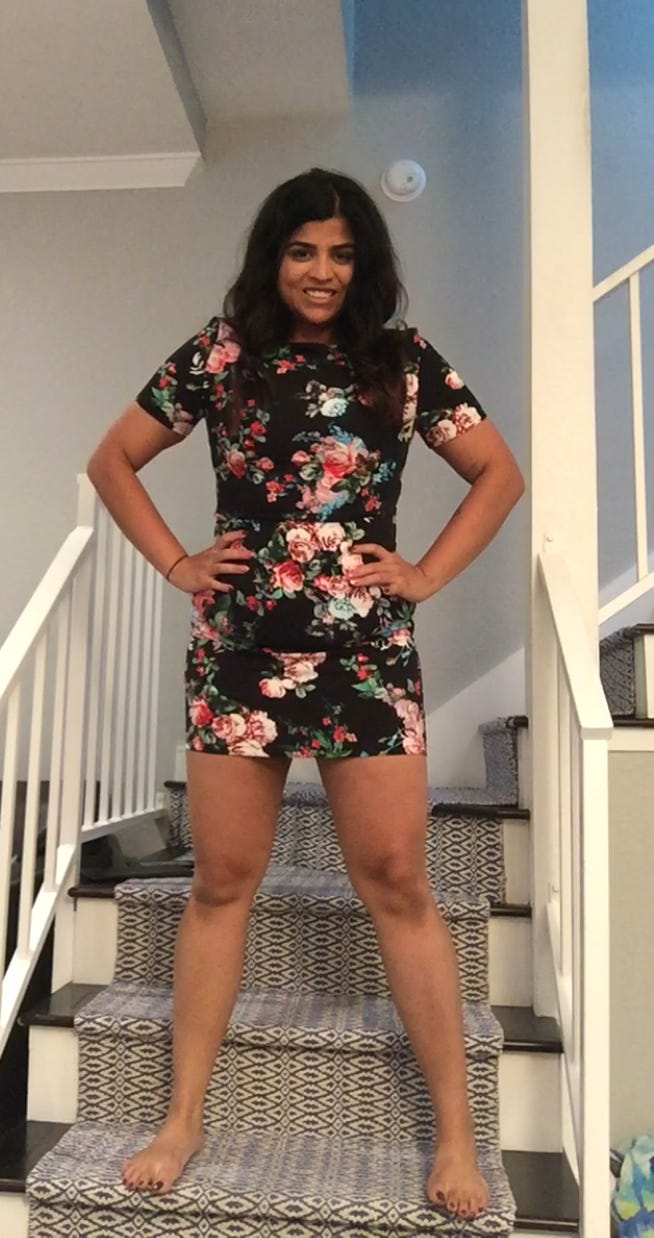
Proof? Watch this video of me in a top that definitely does not look good on me.
Throughout this series I’ve tried to share how I read lines and shapes. Now, in this final part, we’re talking about the piece everyone wants to start with: our bodies, and how they impact the whole picture.
Why I saved this for last
Most style systems start with the body. Old-school advice was all about forcing an “ideal” hourglass. More evolved frameworks (like Kibbe) got closer by saying “honor your lines.” Better, but still limited — because they often left out your actual style preferences.
That’s why I flipped the order.
By now, you already know:
what different lines communicate (Part 1),
how designers use them (Part 2),
and how your style words translate into lines (Part 3).
Only now does it make sense to ask: how do those ideas interact with your body’s natural lines?
Quick caveat: I approach this neutrally. If body talk feels triggering, skip until you’re ready.
Step 1: Identifying Your Body’s Lines
This is the hardest part. It’s very difficult to be objective about your own body. Most of us carry years of conditioning about how we “should” look, which muddies how we see ourselves.
But here’s the thing: we already know more than we think. We’ve had years of practice.
Maybe the advice has always been “cinch your waist,” but you’ve always known you hate that on yourself.
Maybe you’ve consistently gravitated toward boxy jackets or wide pants and couldn’t explain why — they just feel right.
That’s your inner knowing at work. Part of it is your body’s lines. Part of it is your style words.
So if the mirror tests feel confusing, lean on intuition. Ask: Which lines do I consistently like on myself, and which do I avoid? That answer is already pointing you toward your profile.
Here’s the framework to make it practical:
1. The Vertical Line (Length)
This isn’t about literal height. It’s about the impression of height you give. Two people of the same height can project completely different verticals depending on proportion.
Dominant vertical: You look elongated. Limbs or torso run long, your eye naturally travels up and down in one sweep. People may guess you’re taller than you are.
Moderate/compact vertical: You look balanced or compact. Even if you’re tall, you don’t project “extra length.” Your frame feels grounded; your eye naturally stops at breaks.
Test: Take a full-body photo in something simple (a black dress, or black top + pants). Then ask:
Do I read taller than I am? Do my limbs/torso look long relative to my size? → dominant vertical
Do I read more balanced or compact? → moderate/compact vertical
Conventional wisdom for your lines:
Dominant vertical → elongating styles (columns of color, long seams, fluid drape) will feel congruent.
Moderate/compact vertical → elongation is optional. Rhythm (layers, breaks, cropped proportions) may feel more natural.
2. The Horizontal Line (Width/Space)
Ask: Where is the widest part of me, visually?
Shoulder-dominant: Frame reads widest at shoulders.
Hip-dominant: Frame reads widest at hips.
Balanced: Shoulders and hips are roughly even.
Test: Stand in leggings and a fitted tank. Snap a straight-on photo. Squint. Which area feels widest? That’s your natural horizontal anchor.
Conventional wisdom for your lines:
Shoulder-dominant → let your shoulders breathe. Tanks, padded blazers, dropped shoulders. They look “too big” only when squeezed into something like a baby tee.
Hip-dominant → lean in! Wide pants, A-line skirts, curved hems all celebrate your natural line.
Balanced → you’ve got flexibility. You can highlight shoulders, hips, or emphasize the waist as a midpoint.
3. Roundedness vs. Bluntness vs. Angularity
Ask: Are my outlines soft and rounded, or straight and angular?
Curved: Outlines flow in arcs — sloped shoulders, indented waist, rounded hips, fluid limbs.
Angular: Outlines emphasize edges — square shoulders, straighter torso, linear limbs, sharper silhouette.
Blunt: Somewhere in the middle. Not round but also not sharp.
Test: Trace your outline on a photo. Does it arc and flow, or move in straight angles?
Conventional wisdom for your lines:
Curved → softer lines (drape, circles, arcs) will feel congruent.
Angular → clean, linear cuts will feel natural.
Blunt → not overly flowy lines, but also not stiff structure
If you cannot figure this one out, honestly ignore it. I believe all of us have an inner knowing of whether structure looks better on us or flow—based on years of getting dressed. Just go with that!
A note on size and height
This isn’t about being tall, short, slim, or plus-size. A not so tall person can project a strong vertical (SJP). A plus-size person can be angular, blunt, or curved depending on their outline. Look for proportion and impression, not measurement.
While the system I describe above borrows some ideas from Kibbe and similar systems, it isn’t an exact copy of any of them. It is because I am looking at a body purely from a lines and shapes POV as a graphic designer. That said, Ellie-Jean’s body matrix system comes pretty close and if you are still having trouble placing yourself, this video might help.
Putting it together
Combine your vertical, horizontal, and curveness observations into a simple “line profile.”
Examples:
Long vertical, blunt edges, shoulder-dominant (hi, that’s me)
Shorter vertical, curved outline, hip-dominant
Balanced vertical, soft curves, even shoulders/hips
That’s your baseline.
Step 1½: What to do with your body assessment
So you’ve got your line profile. Now what?
Here’s the most important thing:
You are never required to emphasize your body’s most dominant lines. Only you get to decide how you want to look.
Your body’s lines are just information. You can:
Highlight them (alignment)
Balance them (neutralize)
Or soften them (contrast)
Here’s a quick cheat sheet:
Body Line: Strong Vertical
If your style words want to emphasize it: Long seams, columns of color, unbroken outfits
If your style words want something else: Break with belts, layering, curved hems
Shoulders = widest point
If your style words want to emphasize it: Shoulder pads, halter cuts, square necklines
If your style words want something else: Honor width but soften with drape, curved fabrics
Hips = widest point
If your style words want to emphasize it: Wide pants, A-line skirts, grounding volume
If your style words want something else: Smooth with fluid fabrics, elongate with verticals
Curved outline
If your style words want to emphasize it: Drape, soft fabrics, fluid shapes
If your style words want something else: Balance with tailoring, clean edges
Straight/blunt outline
If your style words want to emphasize it: Clean cuts, verticals, sharp lines
If your style words want something else: Add curves with ruffles, circle hems, rounded jewelry
Use this as a menu, not a rulebook. Alignment feels effortless; misalignment can still work if you use clothing to bridge the gap.
Step 2: When body and words align
When your natural lines and your style words are on the same team, dressing feels almost effortless. Clothes reinforce what your body already communicates.

Example:
Words: Chill, Modern, Commanding
Body: strong vertical, wide shoulders, blunt edges
Result: congruence without trying. The vertical says “Commanding,” the bluntness says “Modern,” the space between lines says “Chill.”
Step 3: When they don’t align
When your lines and words don’t match, clothing just does more of the work. That’s not bad — it’s a different strategy.

Examples:
Words ask for curves but body is straight → add drape, round hems, curved jewelry.
Words ask for verticals but body is compact → add verticals with seams, columns, lapels.
Words ask for horizontals but body reads vertical → add ease with dropped shoulders, wide belts, layering.
This isn’t “fixing.” It’s translating.
How it comes together for me (Case Study)
My words: Chill, Modern, Commanding.
My body: dominant vertical, wide shoulders, blunt.
Here’s what that means in practice:
Commanding + vertical = long trousers, unbroken color columns, sharp seams. Easy.
Modern + blunt = clean cuts, straight trousers, crisp shirting. No ruffles.
Chill + wide shoulders = oversized knits, relaxed trousers, open blazers.
My formula: start with vertical + structure, then add ease.
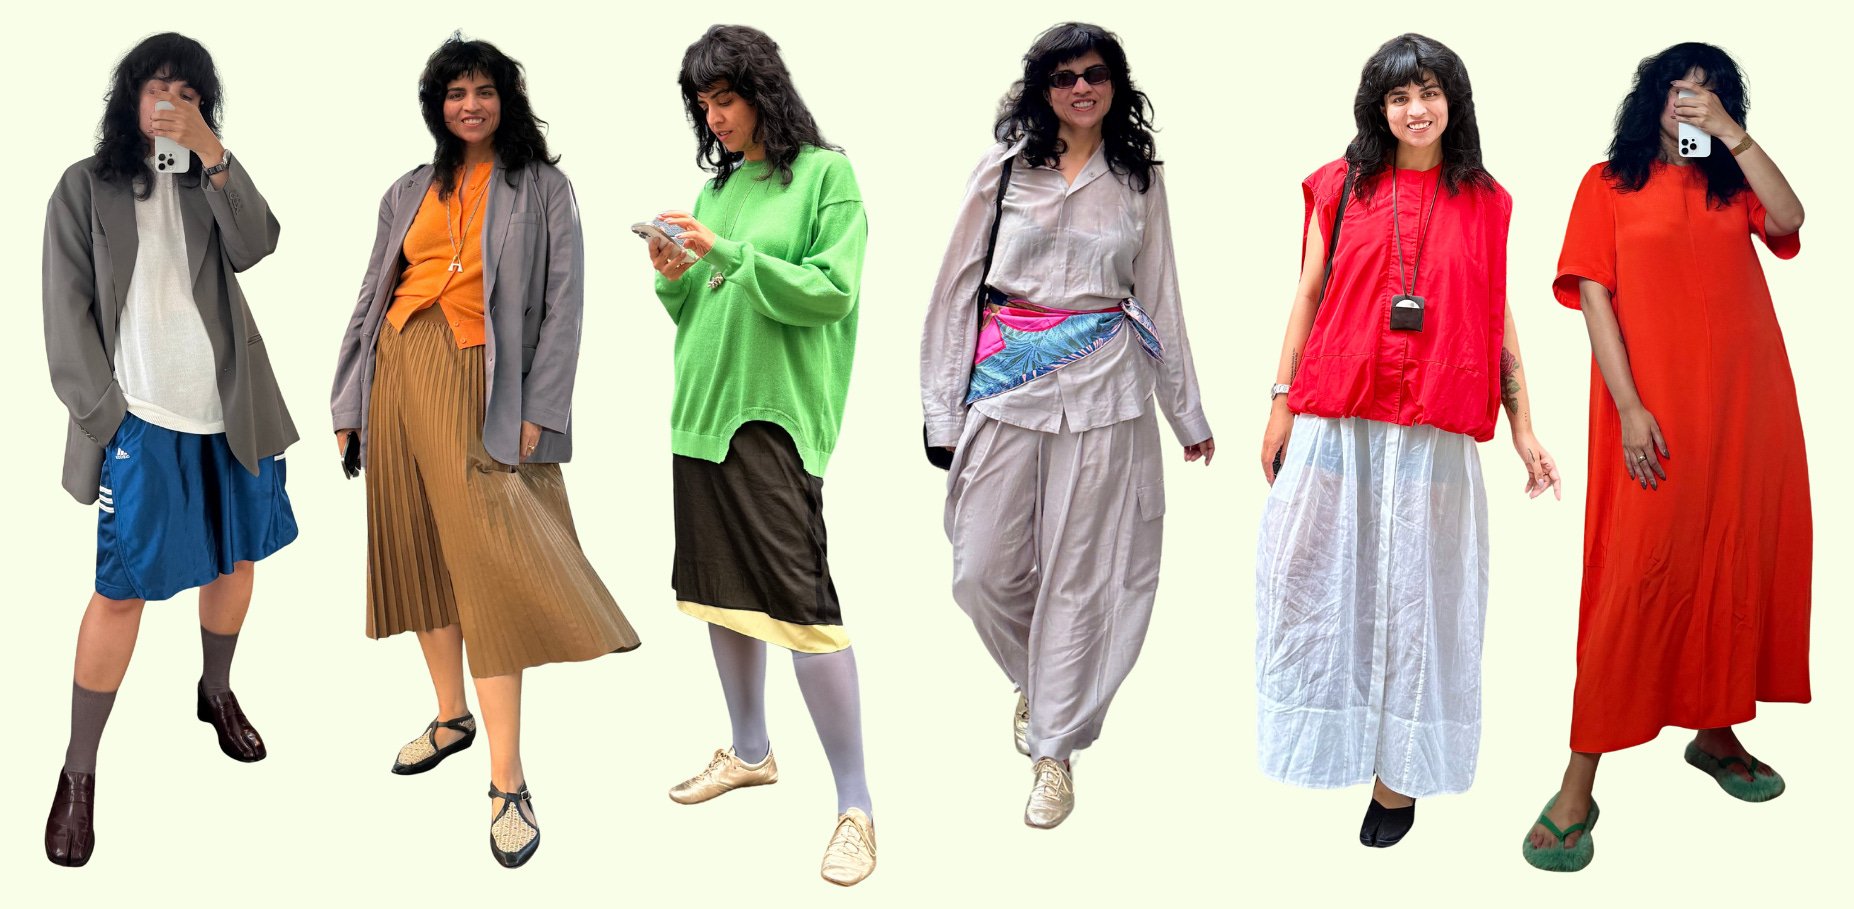
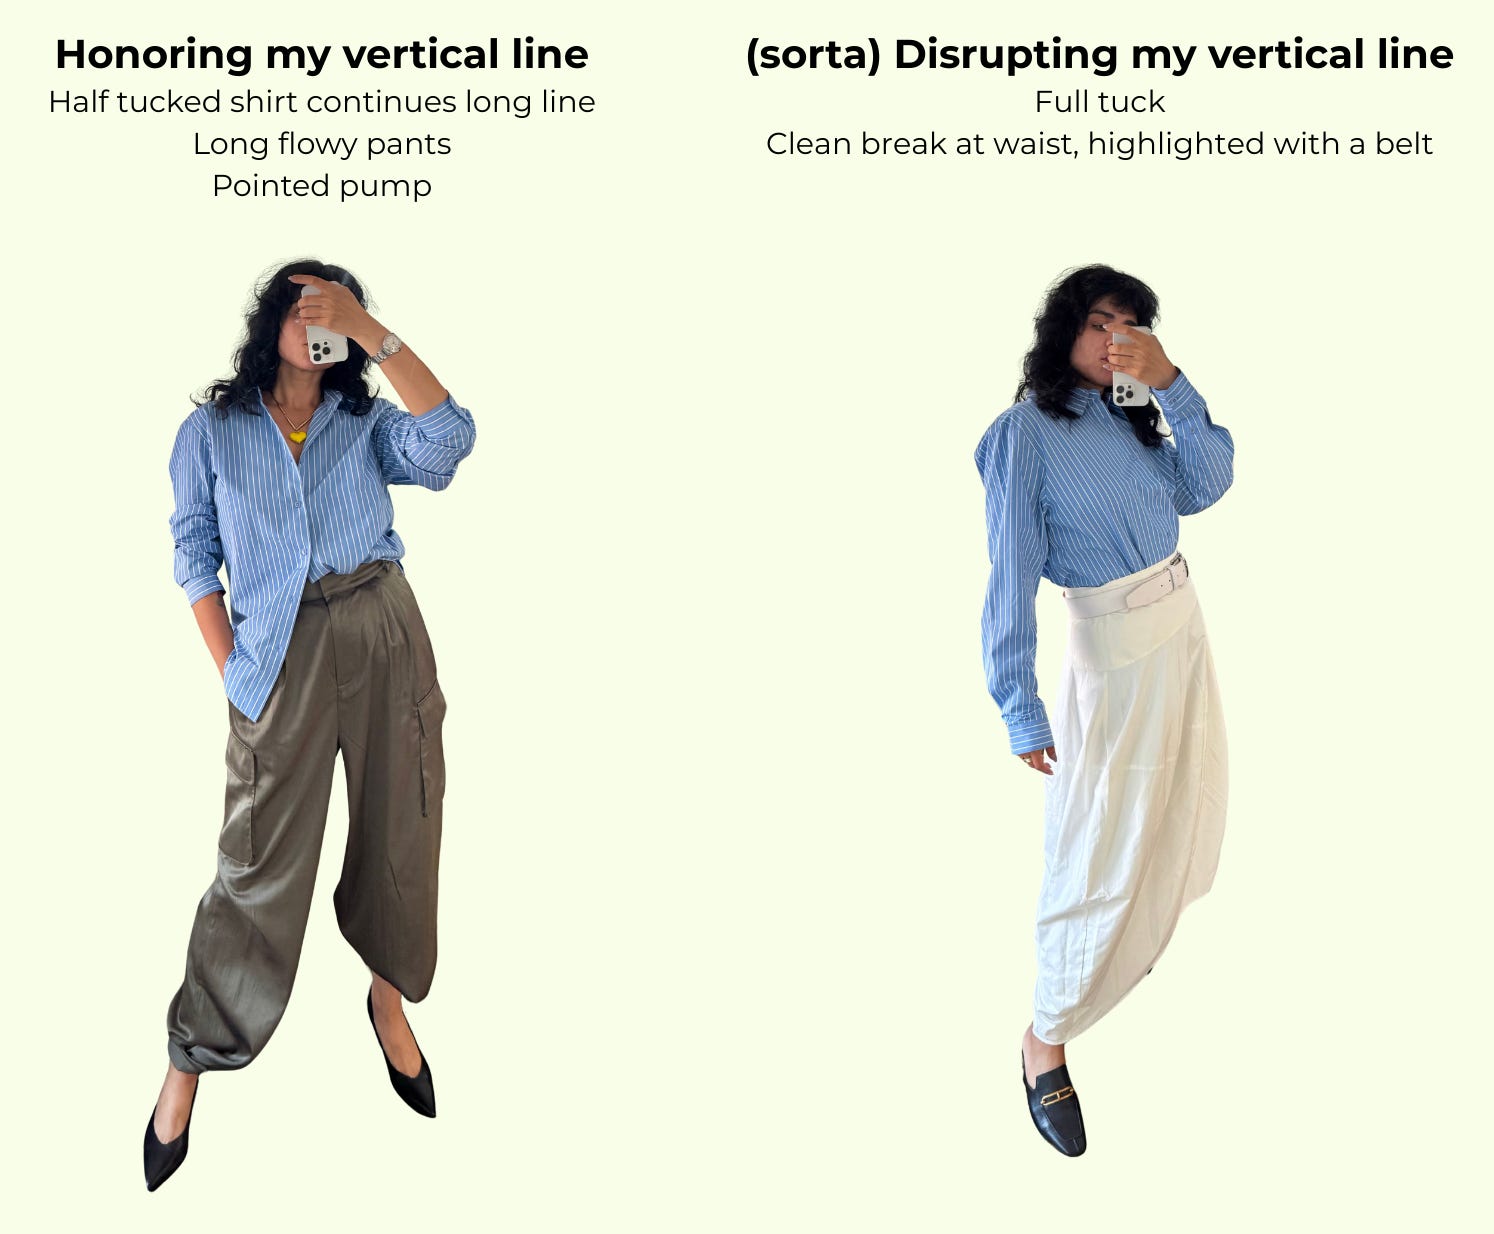
Vertical: I rarely do a clean tucked in look. Either it is a half tuck, or I throw a blazer on top to continue that line. Again, this is not a rule, it is just my preference. I usually go for clothing that creates long sweeping lines.
Structure: I ADORE blazers. Easy way to honor my broad shoulders and add structure. When I don’t go for a blazer, I pick tops that have ease in shoulders. I am rarely found in something where the seams meet my shoulder at the shoulder joint.
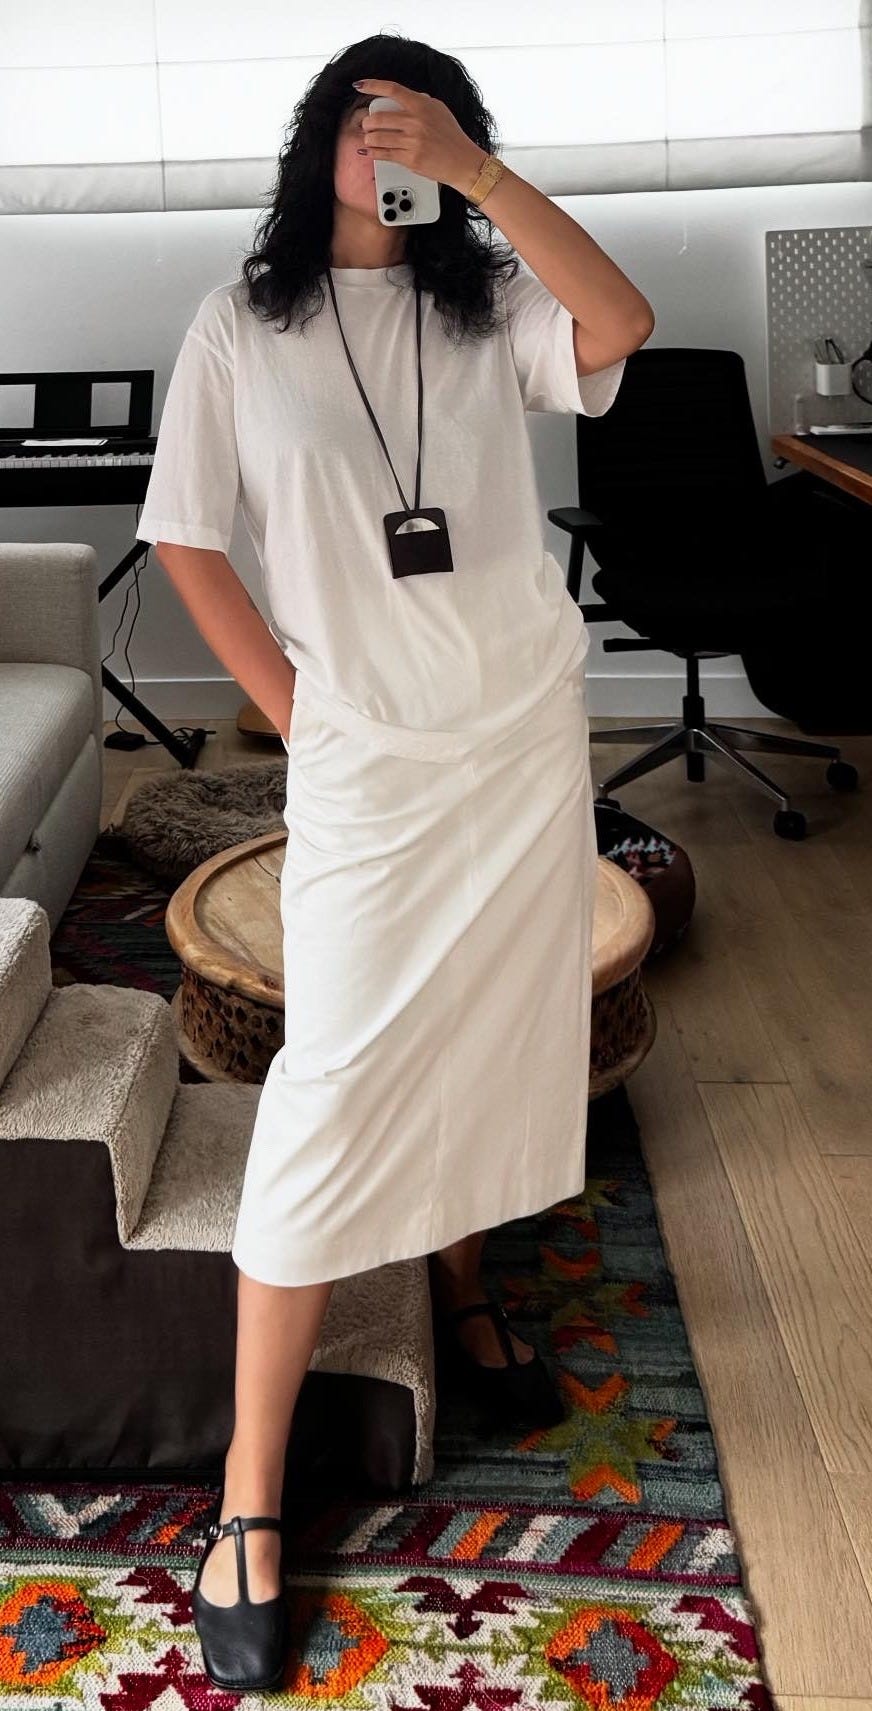
Ease: You can see this easily in my clothing. Sometimes it means oversized clothing, like most of my fits. But when I do a little bit of a cinch like in the image with the scarf, there is a whole bunch of ease in the outfit otherwise.
What if my words were different?
Chill, Romantic, Commanding
I’d keep vertical (commanding).
I’d keep shoulders (commanding/modern).
To bring in “romantic,” I’d soften how I show shoulders: boatnecks, off-shoulder tops, draped fabrics. Same line, different mood.
Chill, Romantic, Playful
Option 1: Ignore my vertical and go all-in on words — horizontals (ease), curves (romantic drape), playful (curves, diagonals more than vertical).
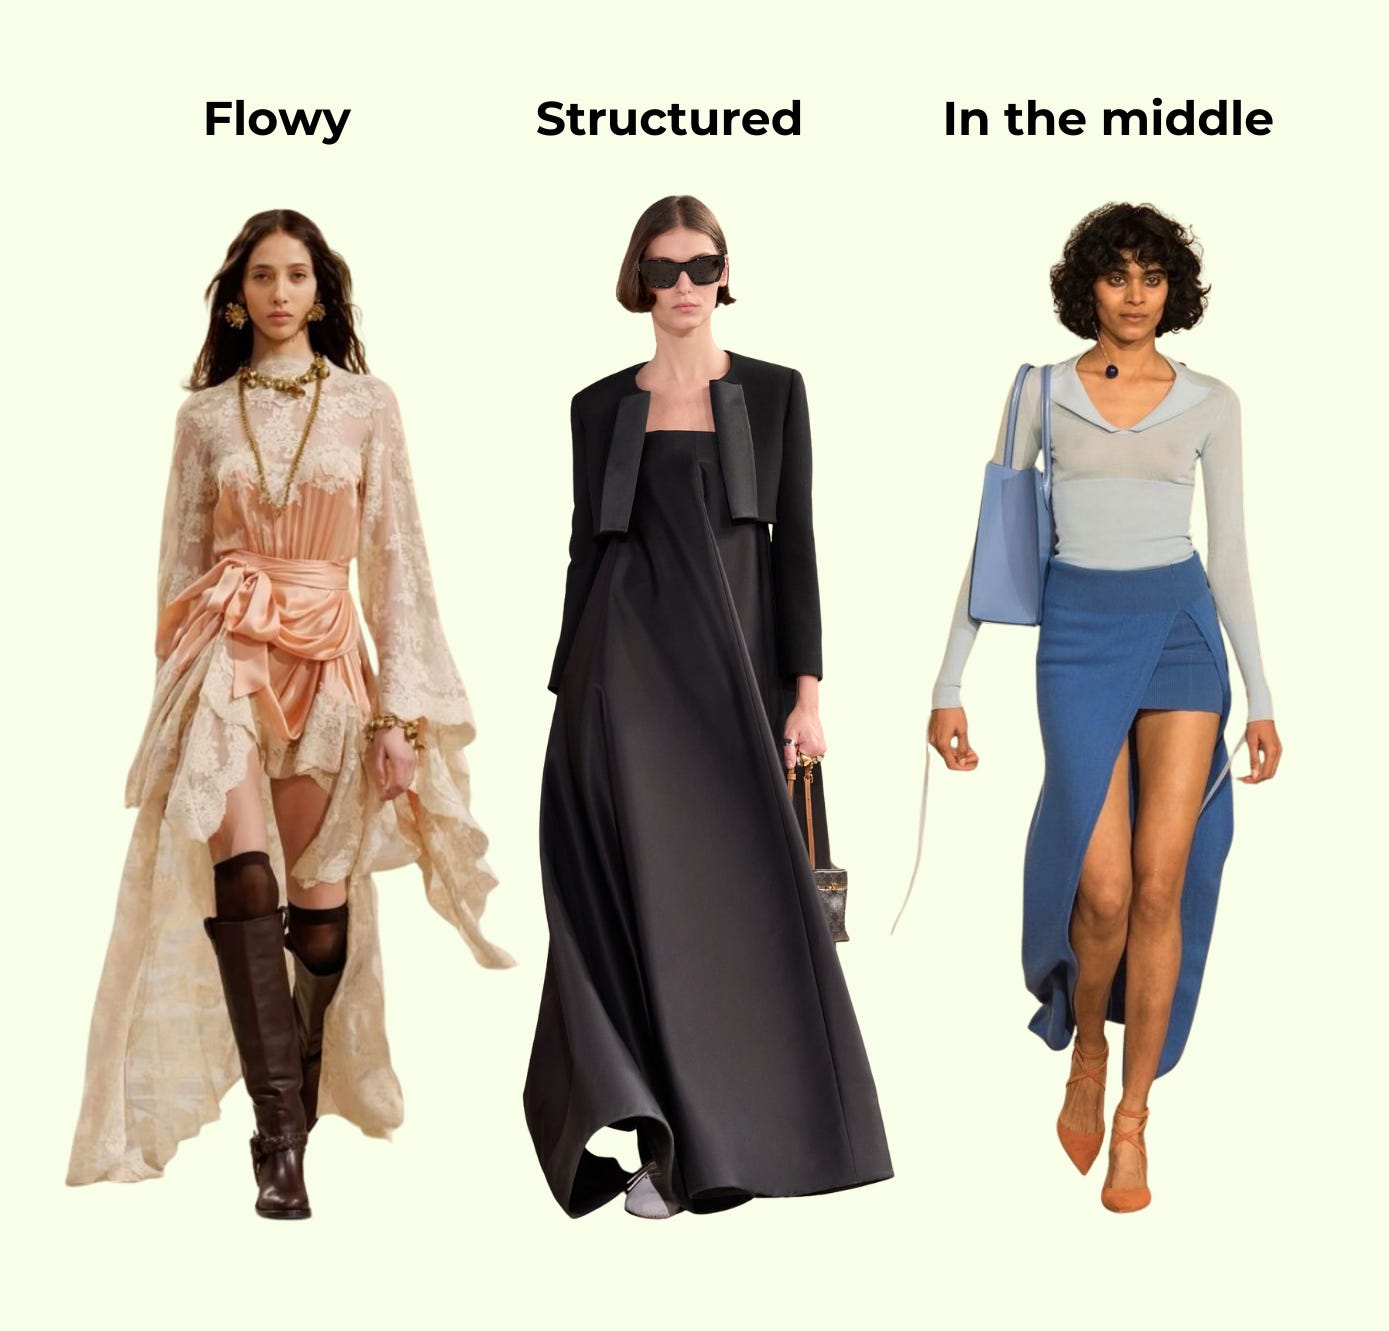
Option 2: Still acknowledge my vertical, but let it support instead of lead. E.g., a long linen skirt (vertical) with a relaxed, draped top (chill + romantic) in a sturdy grounded fabric.
The point: you don’t have to erase your body’s lines. You can let them lead, or let them sit quietly in the background. Both ‘work’ because it will be designed based on your preference.
Alignment vs. Intention
Your body lines don’t dictate your style. They’re just a starting vocabulary.
When body + words align → emphasize.
When they don’t → contrast or balance intentionally.
Both are powerful. The only mistake is leaving it unconscious.
Wrap-Up
This is why body comes last. It’s not the beginning of the style conversation — it’s the refinement layer.
Some of you will find joy in alignment, leaning into what your body already gives you. Others will love the creative tension of contrast, dressing against your lines to achieve your words. Both are equally valid.
If this still feels fuzzy, don’t stress. This clicks more with practice than theory.
Start small:
Notice lines when you get dressed.
Pay attention to shapes when you shop.
Clock which lines feel like “you,” and which don’t.
Come pack to the series and read it every so often. I have an anecdote to share here. I have done yoga for years, including a 200hr yoga teacher training. Yet, recently I was in warrior 2 when the instructor gave a cue about ribs alignment that suddenly made sense. Somehow, it took me all these years to understand the relationship between hip, chest, and neck rotation in the pose.I think these concepts are similar. The more you revisit them, the more they will make sense.
Over time, it becomes instinct.
And remember: lines and shapes are just the foundation. Color, fabric, texture, contrast, and space all layer on top. But if you take nothing else from this series, take this: once you’ve seen lines, you can’t unsee them. They’re already sharpening your intuition every time you get dressed.
PS: No affiliate links here. If you’re curious about anything I’m wearing, just ask — I love talking about this stuff. And if you’re into this post, the best way to support is by liking, commenting, restacking, or sharing with your friends (even the ones not on Substack yet). It really helps, and I’m so grateful for it.
A short course "design of everything for every body as a design object". Bravo, this is such a powerful and inspirational masterpiece, love this so much!
Fun, illuminating, and healing! These posts are just what I needed. I'm not trying to avoid my thick waist, I'm loving a strong vertical! My non-traditional wedding dress is a strong diagonal, which was exactly right for my wedding day, but more drama than I want IRL so that's why I haven't worn it again. This is why I love blazers (more vertical!) in theory but struggle to find ones I can wear all day (too confining on the shoulders). I pulled my t-shirt out of a full tuck this morning after reading this post and an "off" outfit improved immediately. This is so great. Thank you for sharing your wisdom.